Are you planning to give your hardwood floor a dark, dramatic look?
If so, you’re on the right path. Wood staining promotes a rich and deep hue that highlights the natural wood grain.
Besides aesthetic benefits, staining also offers protection from moisture, sunlight, and scuff marks.
In this guide by WFC Wood Floor Cleaner, you’ll learn how to stain wood floors properly, as well as the best type of stain to use and how to care for your stained hardwood floors.

How to Stain Wood Floor – Steps
There are three major steps for this process — namely, sanding, staining, and wood sealing.
What you need
- Paintbrush
- Lambswool applicator
- Sanding sponge
- Wood stain
- Polyurethane
- Latex gloves
Wood stains are formulated with pigment or dye. There are two commonly used types of wood stains: water-based and oil-based.
Water-based stains tend to have advantages over oil based and have gained market preference.
Water-based stains evenly adhere to wood, unlike oil-based which tend to seep into the wood pores without raising the grain.
Water-based stains dry quickly and allow for a quick fix. They also emit less odor than oil based stains.
In terms of flammability, oil based stains are highly flammable, and thus are a safety hazard.
Sanding wood
Remove furniture and other items including baseboards and any nails. Cover the doorways with plastic sheeting before you start sanding.
This is a process involves a lot of dust, so cover anything that you don’t want to be engulfed in dust.
Sanding is a critical process that determines the outcome of a stain. Besides removing the existing layers of sealant, it allows more stain to absorb and creates a darker look.
Sanding is done using a sanding block or orbital sander. You can do it yourself if you don’t mind the dust and exhaustion — or you can hire an expert.
- Start with 120–grit sandpaper if you are dealing with a refinished wood. For new wood start with 80–grit.
- After all the imperfections have been removed, wipe off all the dust and debris of sandpaper grit.
- Now use 180–grit to 220–grit sandpaper to remove all the marks caused by the initial sandpaper.
- Vacuum all the dust using a heavy duty vacuum and follow that with damp mop or rags to raise the grain.
- Let the wood dry as you prepare to stain.
If you are dealing with a painted floor, you’ll have to begin by removing the paint before you sand.
In our guide on how to get paint off wood floors, you will find ideal techniques to use.
Staining the wood

Before you begin this process, it is important to understand the wood species you are dealing with.
There are woods that may turn blotchy when stained. Good examples are softwoods such as pine or fir and hardwoods like cherry, maple, and birch.
To avoid blotching, consider applying a pre-stain wood conditioner that prevents uneven absorption of the stain. Nevertheless, a gel stain can still be applied without needing a conditioner.
Check for dents and gouges, and fill them with a pigmented grain filler such as putty. It has to match the wood or stain color to avoid blotching.
Woods with an open grain structure also require filling to attain a smooth finish.
Allow the wood filler to dry and remove any excess using a scraper. Use a fine-grit sandpaper to sand it slightly so that you are working on a completely smooth surface.
When all is set, proceed with staining as below:
- After mapping out your path and ensuring proper ventilation, stir your wood stain thoroughly.
- Test the stain on a small, hidden section of your floor before you apply it to the entire surface.
- Read the manufacturer’s instructions on how to apply the stain: It could either be with the grain or cross grain.
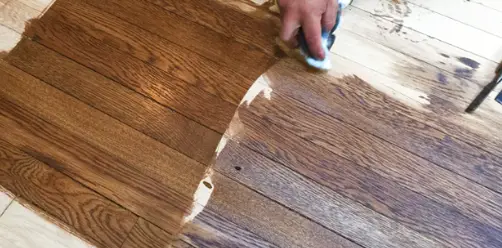
- Beginning from one of the corners opposite the doorway, apply the stain using a lambswool applicator and a two-inch paint brush for corners and where the floor meets the baseboards.
- Since a stain cannot be removed once dried, always start with thinner coats as you add more until you achieve your desired level of darkness.
- Use cleaning wipes or an old rag to remove excess stain by wiping out along the grain.
- Let the stain dry completely for the next 24 hours before you proceed to the next step of protecting the wood.
Apply sealant (Polyurethane)
Although not mandatory, you should consider protecting your stained wood from water, scratches, and fading. This is only through the application of a topcoat sealer such as polyurethane.
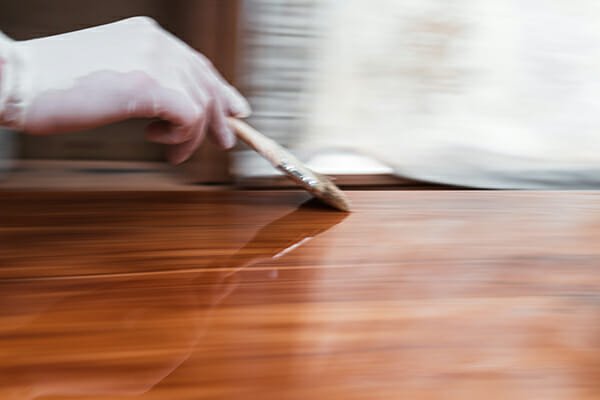
Use a brush to give your floor one to two coats of a polyurethane finish. Give it at least a day to completely dry before allowing some traffic.
Conclusion
After staining, you may realize your wood looks beautiful and new again.
Although refinishing offers some level of protection, it does not guarantee protection against long term exposure to water, as well as wear and tear.
It is now your duty to your beloved floor to ensure that spills are mopped up immediately, the entryways have mats, and you don’t the floor with your shoes or by dragging heavy objects on it.